Step-by-Step Guide to Professional Honey Removal.
Finding a beehive in your home can be stressful, but the real challenge often comes after the bees are gone. Leftover honeycomb, wax, and honey can cause damage to your property, attract pests, and create new bee infestations. That’s why professional honey removal is just as important as removing the bees themselves. In this guide, we’ll walk you through the step-by-step process of professional honey removal so you know what to expect and why it matters.
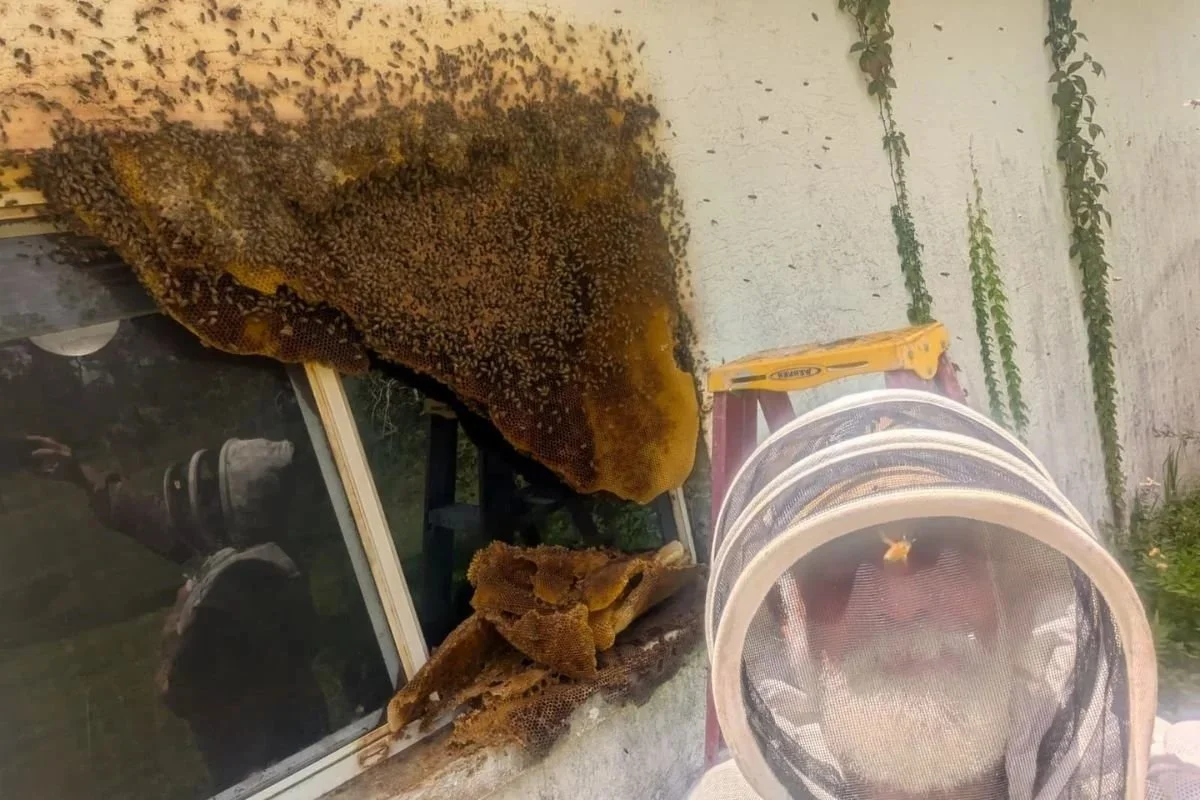
Guide to Professional Honey Removal.
Why Honey Removal Is Essential
Many homeowners assume that once the bees are gone, the problem is solved. Unfortunately, that’s not the case. Honey and wax left behind can:
Melt in the heat and seep through walls or ceilings, causing stains and foul odors.
Attract ants, cockroaches, rats, and other pests looking for food.
Lure new swarms of bees to the same location.
A professional honey removal ensures your home is completely cleaned, deodorized, and protected from future issues.
Step 1: Inspection and Assessment
The first step is a thorough inspection. A bee removal professional will carefully check the affected area to determine:
The exact location of the honeycomb.
The size and extent of the hive.
Any damage caused by the bees.
This step is crucial because honeycombs can be hidden deep inside walls, ceilings, attics, or floor cavities. Using thermal cameras or other detection tools, professionals locate every part of the hive to avoid leaving anything behind.
Step 2: Safe Hive and Honeycomb Removal
Once the hive is located, the removal process begins. The professional will:
Open up the wall, roof, or other area where the hive is hidden.
Carefully remove the entire honeycomb structure, including wax and brood comb if present.
Collect any remaining honey and clean up spilled residue.
This step is done with great care to avoid damage to your home’s structure and to ensure no honey is left behind. Partial removal can lead to re-infestation, so professionals make sure the area is completely cleared.
Step 3: Cleaning and Sanitizing
After the honeycomb is removed, the next step is deep cleaning and sanitization. This is one of the most important stages because honey is sticky, and even small traces can keep attracting pests. Professionals typically:
Use eco-friendly cleaners to scrub the area.
Remove any lingering bee scent (pheromones) that could attract new colonies.
Sanitize the space to prevent bacteria or mold growth.
This step not only protects your home but also eliminates the “sweet smell” that signals to other bees that this is a good nesting spot.
Step 4: Drying and Deodorizing
Moisture from honey can soak into wood, drywall, or insulation. If left untreated, this moisture can cause mold, rot, and structural damage. That’s why professionals often use fans or dehumidifiers to dry the area completely.
Deodorizing is equally important. Professional bee removal teams use natural deodorizers to eliminate any lingering smell of honey or beeswax. This step ensures your home smells fresh and discourages future bee activity.
Step 5: Repairing and Sealing Entry Points
Once the area is clean and dry, the final step is repairing and sealing. The professional may:
Replace drywall, roofing, or siding that was opened during removal.
Seal gaps, cracks, and holes where bees originally entered.
Install screens or barriers to prevent future access.
This step is what makes the process long-term effective. Without sealing entry points, there’s a risk that another bee swarm could find the same spot and rebuild.
The Benefits of Hiring a Professional
While DIY honey removal might sound tempting, it often leads to incomplete cleanup, property damage, and recurring infestations. Here’s why hiring a professional is the smarter choice:
Safety: Bees can become aggressive if disturbed, and honey removal often involves cutting into walls or ceilings.
Proper Equipment: Professionals use tools like thermal cameras, protective gear, and specialized cleaning solutions.
Full Cleanup: They ensure all honey, wax, and residue are removed—something that’s hard to guarantee with DIY.
Warranty: Many professional services offer warranties or guarantees, giving you peace of mind.
Preventing Future Honey Problems
Once the honey removal is complete, there are a few steps you can take to keep your home bee-free:
Inspect your home seasonally for cracks, holes, or gaps where bees could enter.
Keep your attic and wall cavities well-ventilated.
Avoid leaving sweet smells, open trash, or exposed food outdoors that could attract bees.
Regular maintenance and early detection are key to preventing another infestation.
Final Thoughts
Professional honey removal is more than just cleaning up a sticky mess—it’s a critical step to protect your home, prevent future infestations, and maintain a safe living environment. By following a thorough process of inspection, removal, cleaning, drying, and sealing, experts ensure that the problem is solved for good.
If you suspect there’s honey left behind after a hive has been removed, don’t wait. The longer honey sits, the more damage it can do. Contact an eco-friendly bee removal service to take care of the problem quickly and safely.